The fundamentals
Menus
Names and dates that are clickable are blue and when you hover a over them with a mouse, they become underlined and change colour as shown here.
By clicking on an individuals name you can access their full record. Each tab contains specific information about the contact you clicked on.
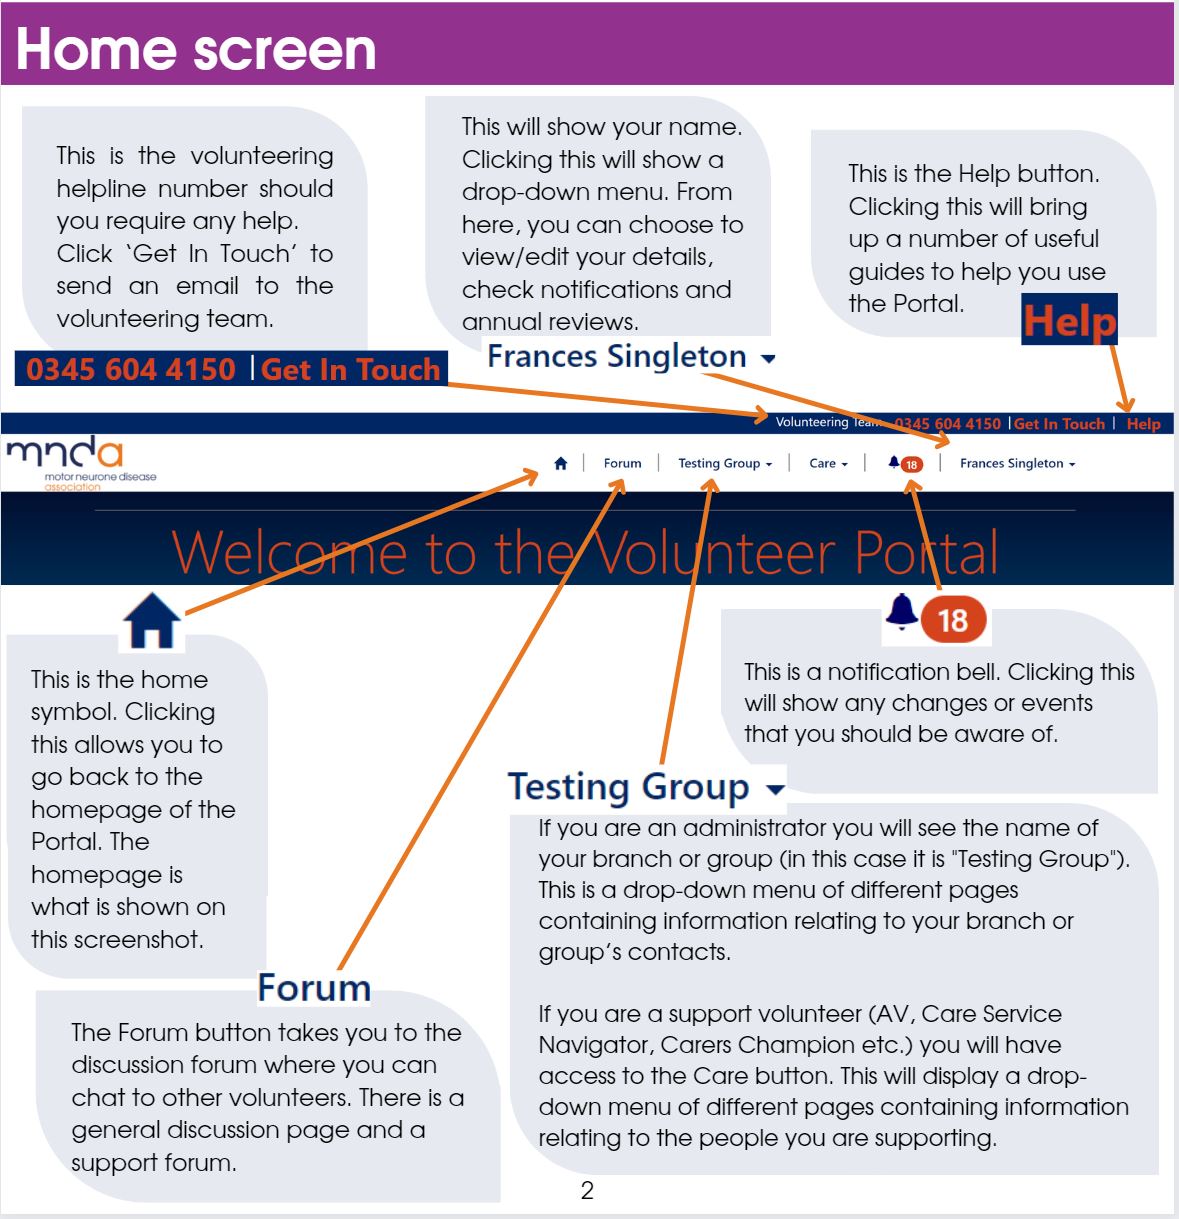
Home screen
Filters
Filters are a handy tool that allow you to sort data based on certain criteria (e.g. surname or forename). The filter option is available on most pages within the Portal and can look similar to the below screenshot (you may benefit from clicking through each page within the Portal to see the filters that are available for each list).
Advanced filters
Filters can also be used if you have limited information about a person i.e. only a first or last name. If you know their first name, you can type this into the box but if you only know their last name you would need to use the * symbol before typing their last name.
For example, if you know you are looking for information about Mr Bloggs you can type *Bloggs to filter the results by last name.
Filters can be used together with other filters to create very specific results. For example, using the Connected in the last 60 days tick box in combination with other filters such as PwMND filter will bring up a list of only people with MND who were registered with your branch or group in the last 60 days.
Take a look at combined filters
You can use a combination of filters to see a smaller list of people connected to your branch or group. For example, use the Full Name box to type in their name or partial name e.g. *Bloggs and Deceased = No then click Apply Filters. This will provide you with a list of people connected to your branch or group with that name and who are not deceased.
Sorting lists
You can sort lists by clicking on any of the column headings.
For example, as indicated by the pointer finger below, if you click on the Forename heading, you can sort the list into alphabetical order from A to Z. If you click it again the list will be shown from Z to A. You can click on the other headings to see how they can be sorted to suit you.
Currently this list is sorted by Surname in ascending alphabetical order as shown by the small upwards arrow on the screenshot above. If this was sorted in descending alphabetical order the arrow would be facing downwards as shown to the right.
All the other columns can be sorted this way and have up or down arrows by the headings.
Making and submitting changes
A great feature of the Portal is that you, the people who know most about your local community, have the ability to make changes to records. Any changes you make in the Portal will directly change the information we hold in the central database. It's important when you are changing information about a person that you are doing it at their request and inputting accurate information.
A lot of pages contain areas where information can be edited. Text boxes that look like this are editable and by clicking on them you can input new information (1). Areas without text boxes are not clickable, are not editable, and the information in those boxes cannot be changed (2). Normally this is because this information is connected to a process that has to be completed by one of our office teams (e.g. date of death is completed by our Care Admin team).
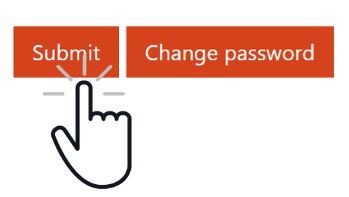
Once you have made your changes, always remember to click the Submit button to save them. If you don't press Submit your changes will be lost and you will need to input the information again.
Your personal menu
My details
This is where you can see personal information that we hold about you. You can alter any of this information at any time.
Using the tabs along the top you can navigate to the various pages:
Summary page has your personal details such as your name, pronouns and contact details. You can edit these at any time. To save any changes scroll to the bottom left of the page and hit the Submit button.
Your Emergency Contact details can be filled out here. These are visible to other volunteers with administrator access so they can contact your next of kin in an emergency.
You can select your personal contact consents using the drop-down arrow on the right and clicking the Submit button. These consents have been simplified for clarity so if you need a more detailed consent please contact fundraising@mndassociation.org.
You can view the different Volunteer Roles you are registered as. If the information we hold about you is incorrect you can change your start date for these roles using the drop down arrow on the right. If the roles listed are not currently correct please contact volunteering@mndassociation.org.
My notifications
Notifications show the things that have changed. Things you will receive notifications for are; change of address, contact details, new members being added and notification of death for people you are connected to, or who are connected to your group or branch.
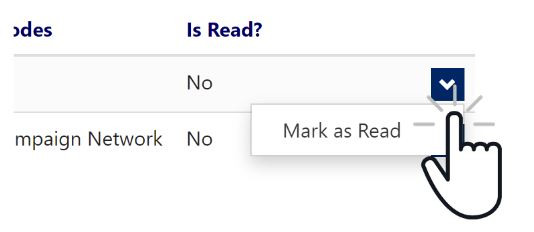
Overview of the notifications screen
To acknowledge the notification you can select the blue arrow on the right and select mark as read. This will make the notification counter decrease in the top right hand corner.
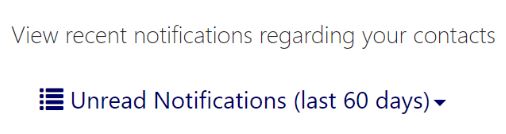
Use the drop down above the headings (to the left) to choose the type of notifications you want to view - unread or all. Notifications disappear after 60 days giving you plenty of time to see them.
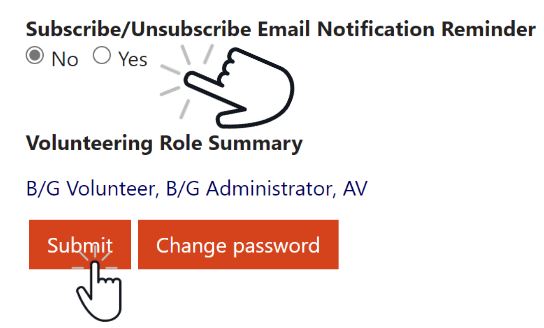
You will receive a weekly digest of your notifications. If you wish to start or stop this email you can do so in the My Details page at the bottom of the summary tab by clicking the Subscribe/Unsubscribe Email Notification Reminder and then clicking Submit on the page.
My annual reviews
This is where you can create an Annual Review. You can use these questions as an opportunity to reflect on your volunteering before you meet for your Annual Review in person. When you submit this, your Area Support Coordinator has access to see your answers which means you can have a more natural review conversation that does not involve working through the form.
Check out the My Annual Reviews screen
To create a new Annual Review, click Add New Annual Review. Fill out the form and when you have completed it, click Submit.
Not all volunteers or Area Support Coordinator's use the Annual Review form built into the Volunteer Portal. This may be because they feel it is too formal. However, using the form offers a great opportunity to think through your conversation before meeting with your Area Support Coordinator.
Below is a sample of questions that are on the annual review form:
- Date of meeting
- Length of time as an AV
- What are the thing you enjoy about being an AV?
- Main barriers/challenges to you as an AV?
- How could these be resolved or improved?
- How can I support you in your role as an AV?
- Are there any gaps in your knowledge/training?
Group or branch menu
If part of your volunteering involves running a group or a branch, you will have access to the group or branch menu. On the Portal this will show as your group or branches name. In our example this is Testing Group.
Contacts
The branch or group Contacts page displays details of everyone connected to your group or branch, allows you to access individual records for additional detail, and generate mailing lists for both email and postal use.
Overview of the Contacts screen
Filters enable you to display a subsection of contacts which make navigating the list or finding individual contacts easier. You can use a single filter (e.g. constituent code pwMND) or multiple filters at the same time (e.g. Carer and PabMND) Once you have selected the relevant filter(s), use the Apply Filters button to update the page.
You can click on the name of anyone connected to your group or branch and see more details about them.
Mailing lists
This function generates pre-set lists which can be downloaded as Excel files, and used for mailings or mail merges (e.g. to generate envelope labels).
Take a closer look at how to generate a mailing list
What do the different types of consents mean?
After you have selected the relevant option, a Download button will appear and you can download the resulting Excel mailing list.
Lists should be downloaded for a purpose and deleted when they have been used. The Portal is live data which is constantly changing, so downloading the list when you need it and deleting it after using is the best way to keep this confidential information secure. Portal lists are single use.
Since this is confidential information, it should not be shared with others.
Deceased contacts
This menu shows details of people with MND connected to your branch or group who have died in the last 6 months.
You can search for a specific name using the text box and then click on Apply Filter.
By using the * character you can search for partial words or parts of a name (e.g. searching for Jo* might bring up everyone called John, Joan, Joseph etc. or searching for *ian* might bring up everyone called Ian or Brian).
Click on the heading once to select it. This will sort automatically into descending order (e.g. A to Z), indicated by the downward arrow. If you want to sort in ascending order (e.g. Z to A), click the same heading again and the arrow will now be pointing upwards.
You can click on the name or date of death of a person listed as deceased to see further information about them such as a home address and the name of their carer if we have those details listed.
It is important to regularly check this list to ensure you are aware of any new deceased notifications if you are in contact with any family members or wish to send condolences.
Grants
This list displays all the financial support grants relevant to everyone connected to your group or branch, either currently ongoing or previously approved or declined.
The status reason shows the stage the grant is at, which means you can have an informed conversation with the individual about the status of their grant.
You can search for a specific name using the text box and then click on Apply Filter. By using the * character you can search for partial words or parts of a name (e.g. searching for Jo* might bring up everyone called John, Joan, Joseph etc or searching for *ian* might bring up everyone called Ian or Brian).
You can also filter by Application Type, by ticking the appropriate box, or by Received Date, by entering a date in the appropriate box, and then click Apply Filter. If you have applied more than one filter you may want to remove all and start again. To do this click Clear Filter.
All the information displayed in the Portal is confidential and should not be shared except with the owner of that data.
Using filters allows you to see only a subset of grants based on selected criteria. You can use one or more filters at the same time.
Clicking on the grant title will open up the details page related to this grant. This shows you the purpose of the application and amounts requested and awarded, as well as the status of the application.
Loans
This list displays all the equipment loaned from the MND Association to everyone connected to your group or branch, either currently ongoing or previously loaned over the last 2 years.
You can search for a specific name using the text box and then click on Apply Filter. By using the * character you can search for partial words or parts of a name (e.g. searching for Jo* might bring up everyone called John, Joan, Joseph etc or searching for *ian* might bring up everyone called Ian or Brian).
You can also filter by Loan Start Date or Loan End Date, by entering a date in the appropriate boxes and then click Apply Filter. If you have applied more than one filter you may want to remove all and start again. To do this click Clear Filter.
Using filters allows you to see a only a subset of loans based on selected criteria. You can use one or more filters at the same time. Once you have set up your filters, don’t forget to select the Apply Filters button to refresh the page.
More information on Loans filters
Clicking on the loan title will open up the details page, where you can see more information on the equipment on loan, and the status of the loan.
Media
Here you can upload documents and other media relating to your branch, should you wish to do so for example, meeting minutes. All files here will be visible to other group and branch admins.
To access files click your group or branch name under “Account Name” (in this case "Testing Group".) This will open a separate page listing all documents available. You can click on any document title to open it.
To upload media, click on the "Upload New" button which will open the upload window. Under “attach a file”, click on “choose files”, then select the files you wish to upload. Please remember to click the Submit button on the bottom of the page to complete the upload process.
Requests
Here you can see all requests made by your group or branch and submit new ones. This could be a literature request or fundraising materials for example.
Take a closer look at the Requests screen
You can search for existing specific requests using the relevant boxes: Subject, Requested By, Description or Date of Request, and then click on Apply Filter. By using the * character you can search for partial words or parts of a word (e.g. searching for Jo* might bring up everyone called John, Joan, Joseph etc or searching for *ian* might bring up everyone called Ian or Brian). If you have applied more than one filter you may want to remove all and start again. To do this click Clear Filter.
Using filters allows you to see only a subset of the requests made based on selected criteria.
More information about Media filters can be found here
Please note that once you have selected the filter criteria, you will need to click “Apply Filters” for this to take effect.
Care menu
If part of your volunteering involves supporting people on a one on one basis you will have access to the Care Menu.
Some examples of these kinds of roles are:
- AV's
- AVC's
- Carers Champions
- Support Volunteers
- Befrienders
- Care Service Navigators
- Voice Banking volunteers
- Children and Young Peoples Support Volunteers
In this menu you have two options; Contacts or Care Admin requests. Care Admin requests can be things like literature or informing us about a death.
Contacts
The Contacts menu is a tabbed experience with all the information about the person or people you are supporting. You can see more details about the person you are supporting by clicking on their name. We have provided details on each tab and its function in the accordion below.
You are able to edit the information in many of these tabs for example if the person you are supporting has a new telephone number. You can also use the Support Activities tab to enter details of the support you have offered to the person.
If you unsure about the access you have or need for your volunteering role, please speak to your Area Support Coordinator.
Care admin requests
This page allows you to create new requests and submit them to the Care Admin team, and to view any outstanding or previous requests you have made. You can submit requests for things like literature and report RIP notifications.
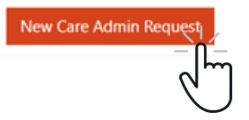
To create a new request, click the New Care Admin Request box and a pop up screen will appear.
If the request is relating to a person you are already supporting or who you think is already known to the MND Association, select Yes and then use the magnifying glass to search for the individual.
This will bring up another pop up screen, where you can use the search box and magnifying glass for any of the subjects shown (e.g. Full Name, Supporter ID etc) apart from the Address. As with previous screens, all of these headings can be used to sort results in either ascending or descending order. Once you have found the individual, tick the box to the left of the row and then click Select.
Content tabs explained
Summary
The summary page displays a contact’s key personal details including contact details. Additional details include who the Area Support Coordinator is and any other volunteers who can see the record. The rest of the information about someone is contained in the tabs that run across the top of the page.
You can view and amend personal details, for example if someone gives you their new address whilst on a visit.
You will not be able to amend Deceased, Deceased Date and Death Notification as this is part of a wider process completed by our Care Admin team. If anyone you are supporting dies you can inform careadmin@mndassociation.org and give their initial and Support ID number.
When you have finished making changes to this page, scroll to the bottom to Submit to confirm these changes.
If you do not submit the changes they will be lost when you navigate away from the page.
Details
The details page provides more detail about the contact and you are only likely to see some of the boxes completed. It is useful for providing additional context as well as capturing important information such as known risks.
You can view and amend all boxes on this page.
Full details of safeguarding issues, where known, will not be included. Instead, the number of safeguarding notes would be detailed and any information you need to know would be captured in Personal Notes or Known Risks.
Children and young people in household will show the number of people under 18 living in the household.
Extended household refers to children who may not live in the household but do frequently visit (like grandchildren, nieces or nephews).
Support activities
The Support Activities page is where you go to upload notes of any support activities you have carried out with the individual for example home visits. A list of all Support Activities relating to the individual contact can be found on this page, whether completed by you or someone else for example Area Support Coordinator.
To add a Support Activity click on the Add Support Activity button.
When you are writing up your Support Activity notes remember that these should be impartial and factual and not contain opinion. Legally, any information we hold about anyone can be requested at any time, it's good to consider this when inputting your notes.
If you are unsure about what you should or shouldn't add, give your Area Support Coordinator a call to clarify the level of detail needed.
Adding Support Activities form
Once you have completed the main categories, including Subject and Activity Type you will then have an opportunity to add Notes summarising what was covered during the activity as well as Agreed Actions.
When you have finished inputting your information, click Submit to save it and send to your Area Support Coordinator to be approved.
If you would like to add Care Evidence related to the specific Support Activity you have recorded for an individual, you should reopen the activity using the blue arrow to the right of the Support Activity you have just submitted. Click on the Care Evidence tab and click the Add Care Evidence button.
We use Care Evidence to capture poor outcomes for people with MND or service gaps that need addressing. To find out more about care evidence go to the care evidence section.
Evidence
The Evidence page displays all Care Evidence relating to the individual contact, whether completed by you or someone else for example an Area Support Coordinator. We use Care Evidence to capture poor outcomes for people with MND or service gaps that needs addressing. This is then reviewed centrally to spot trends.
To add Care Evidence relating specifically to an individual support activity you should use the Support Activities function inside the Add Support Activity function.
Use this page to capture evidence when you become aware of it. not in conjunction with support activity. For example a local issue such as continuing health care (CHC) assessments are taking 6 months. These are then reviewed centrally to spot trends and support working towards a better future for people with MND.
To do this, click the Add Evidence button and add in details on the form.
From here, you can choose a category, briefly summarise the issues and detail the impact this issue is having on the people with MND. Below this, you can also add in whether the individual would be media willing (directly or indirectly e.g. through a case study) if we chose to follow up. Please note we will not share with media or others without seeking expressed consent from the individuals concerned.
Once completed, click the Submit button.
Grants
The Grants page displays the grants that have been applied for. It shows grants that have been awarded and those that are still awaiting review. This can support you to have informed conversations with the people you are supporting about the progress of their grant applications.
Take a closer look at the Grants page
You can sort this display into ascending or descending order by clicking on any of the column headings. You can see further details of the grant by clicking on the downward arrow at the end of the line and clicking View Details.
This will show you the full details about the grant. The status reason displays what stage in the process the grant application is at.
The grant application statistics adds up the value of the grants that a person has received in the last 12 months in each of the categories. This is useful because it shows when an individual might be getting close to their grant allowances for a year. Grant application statistics are updated overnight so if grants have been updated during the day the statistics may be a few hours delayed.
Each person with MND collectively has a Support (Care) (SS) and quality of life (QoL) grant allowance of up to £3000 in a 12 month period. Each support care grant application must be under £1500 and each quality of life grant application must be under £500 with the total for all grants in a 12 month period being under £3000.
- Carers have a £500 grant limit in a 12 month period.
- Young people have a £250 grant limit per child in a 12 month period.
There are three types of grants available.
More information about the grants we offer can be found on our website.
Loans
The Loans tab shows the items that we have loaned to the person with MND. We loan items such as, communication aids and equipment to support with voice banking.
You can sort this display by clicking on any of the column headings. This will sort the information into ascending or descending order.
You can see further details of the loan by clicking on the downward arrow at the end of the line and clicking View Details. This will show full details about the loan.
You cannot create a loan but can see the progress of loans that have been submitted. If you want to request equipment to be loaned to a person with MND you can do this using the equipment loan form on the website and submit this to the communications aids team or to your area support coordinator.
Connections
Connections show anyone who we have listed as linked to the person you are supporting as a carer or health and social care professional (HSCP’s). This can help you when you are going to visit a person with MND.
View the Connections tab in more detail
If we have details of the carer for the person you are supporting and they are connected to the person with MND then you will be able to see that persons details here. Because we do not have explicit permission to display familial connections (such as partner, wife or husband) these individuals will not appear unless they are listed as the carer.
Connections will also display any health and social care professionals that are currently listed as being connected to the person with MND that you are supporting. This is unlikely to be a complete list of health and social care professionals because of the frequency that these connections change but any that we currently have listed as connected, you have access to.
You could ask your Area Support Coordinator to be connected to the family carer if you are also supporting them. This will mean that you will still have contact with them when the person with MND dies to allow you to continue to offer support.
Notes
Notes are the important things you might need to know about the person you are visiting. Things like access requirements, pets or that they live in one area but get their care through a neighbouring one. Not every record will have notes attached to it but you will be able to see any notes that have been added. You can add notes or view any notes that may already be on the record.
MND Connect
The MND Connect tab shows you any contact the person you are supporting has had with the MND Connect helpline or any contact someone else has had with the helpline on their behalf. This gives you a full picture of all the contact a person with MND has had with the MND Association and is a good place to check before visiting or contacting a person with MND or their carer or family for any updates.
Consents
We can only contact people in accordance with their consents. We collect consents using a form. If this hasn't been completed and returned you can also add consents if you are informed by someone that they would like to be contacted by us.
We have three different categories of consents:
- Marketing
If they consent to this, we can send them any communications related to the Association including opportunities for them to be involved for example, campaigning, volunteering or fundraising and requests for donations. We use this for all other communications about the Association, what we are doing, and how we are helping people.
- Services/feedback
If they consent to this, we can send them local branch or group newsletters and service information relating to the support that we offer for example info on support group meetings etc.
- Share details with HSCP’s (HSCP'S being health and social care professionals)
Allows us to share medical details relating to MND with the relevant health and social care professionals.
You are able to edit consent preferences if you are notified by the consent owner that their consent preferences have changed. You can do this by clicking on the arrow to the left-hand side and by selecting the relevant consent. The page will take a moment to refresh before displaying the new consent status. If we have never asked for consent, the default will be set as unknown.
See what editing consents looks like
As a support volunteer you have permission to visit the person as you have been linked with them. However you should not assume we have permission to contact them in any other ways unless explicitly listed. For example if you a visiting someone in your role as a support volunteer you should not assume that in your other role within a group that they wish to receive a festive card.
There are some exceptions where someone may have specifically subscribed to communications or involvement. Membership is one area where people may have said no to updates but still receive ThumbPrint and membership related communications for example, voting at AGM's etc. Some areas of specific communications include Campaign Network Members and Research Newsletters which have been specifically subscribed to.
In these cases, the consents tab will look like this
Anyone who is marked on our systems as 'do not contact' will not receive any communication unless it is directly requested. You cannot mark someone as 'do not contact' but will see it as an alert bar on a record for people who have. This means no contact is initiated from our side unless we have a legal duty or the communication is administrative in nature.